
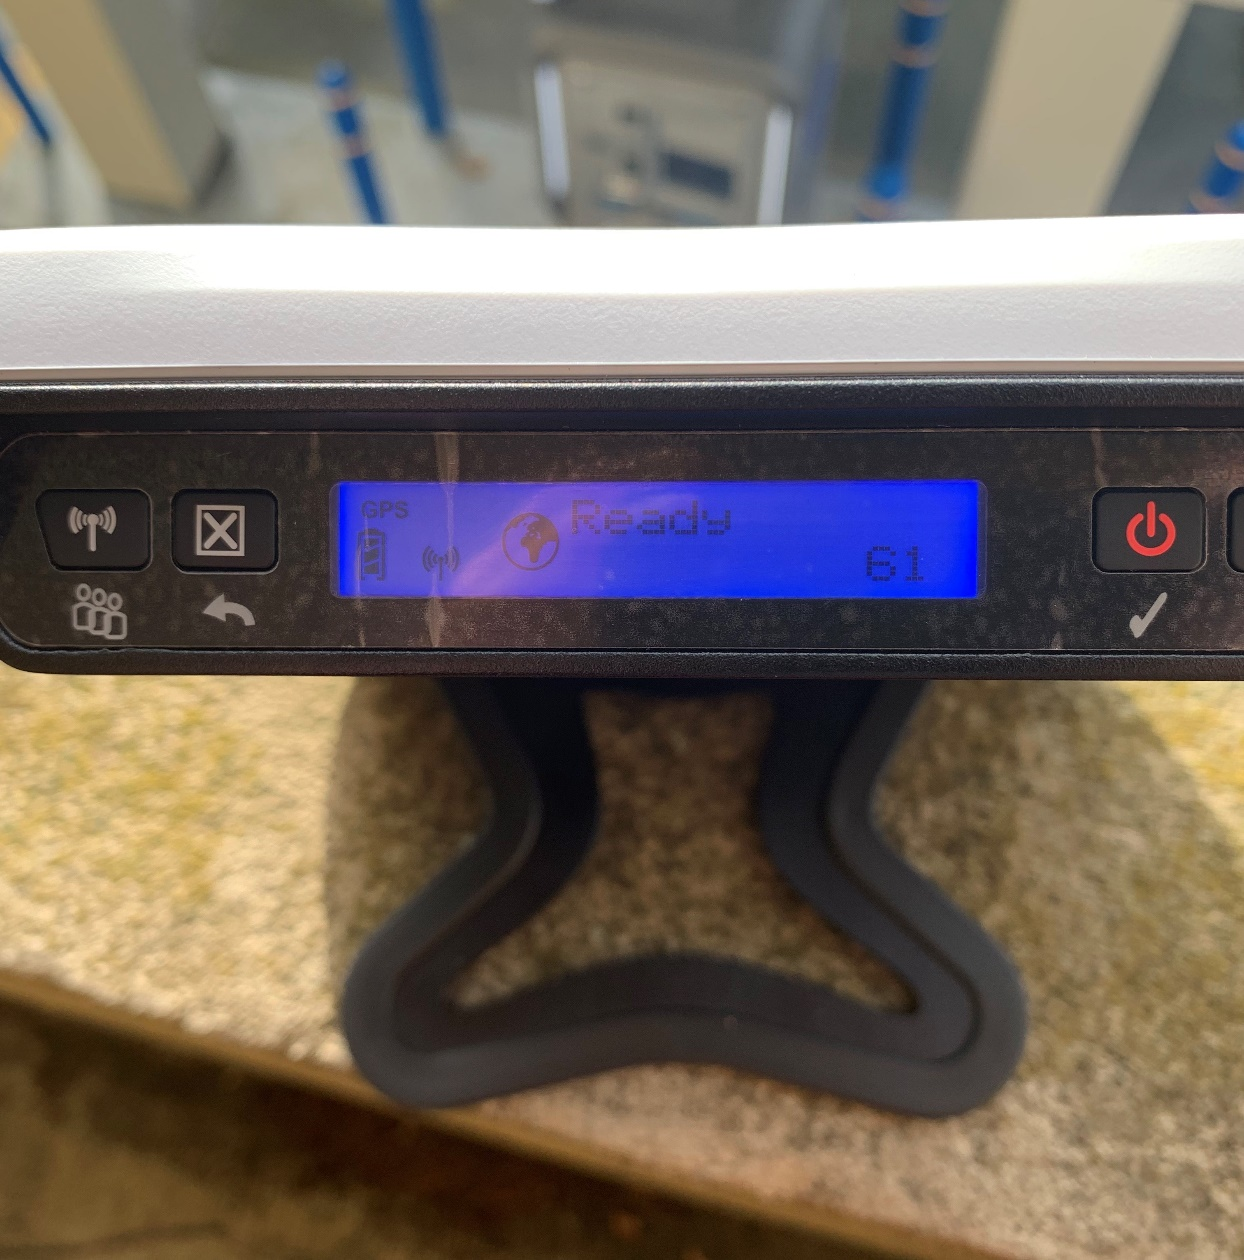
1. Turn on the wireless network radio by pressing the Wi-Fi button to the far left of the LCD display for 3 seconds. When the Wi-Fi signal is enabled you will see the wireless icon on the display.
NOTE: This process can be completed before or after registration on the Inmarsat Satellite Network. If done before, the web console can assist with pointing to the correct satellite.
2. Connect to the terminals Wi-Fi network. The terminal’s default site ID will be 'Hughes 9202'
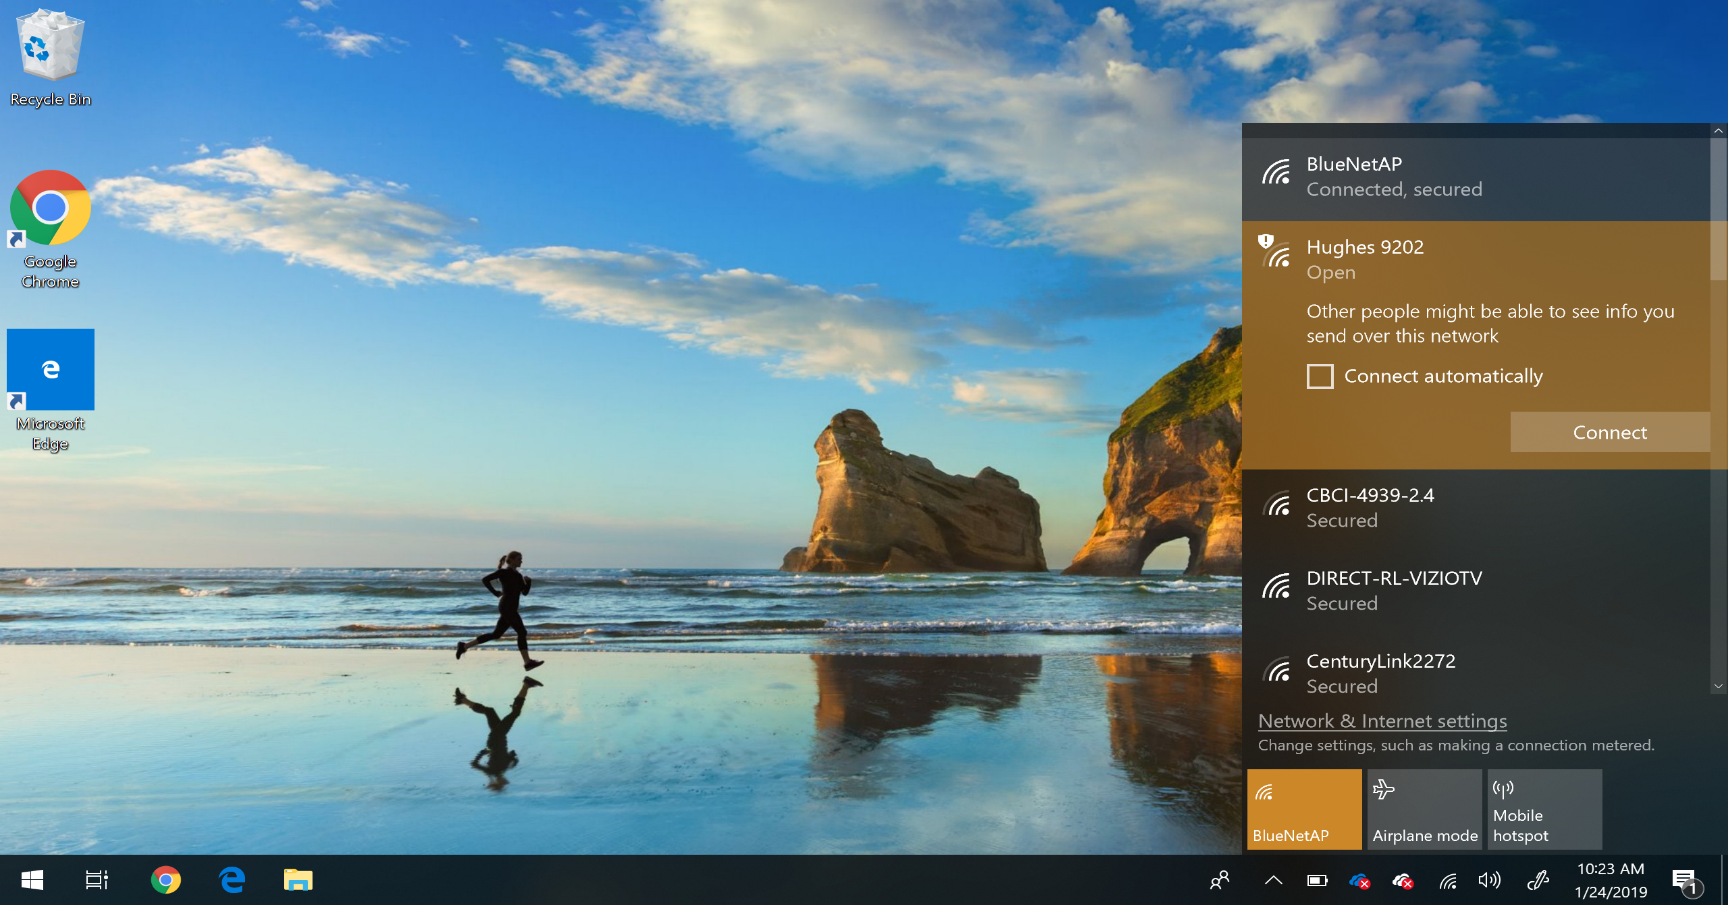
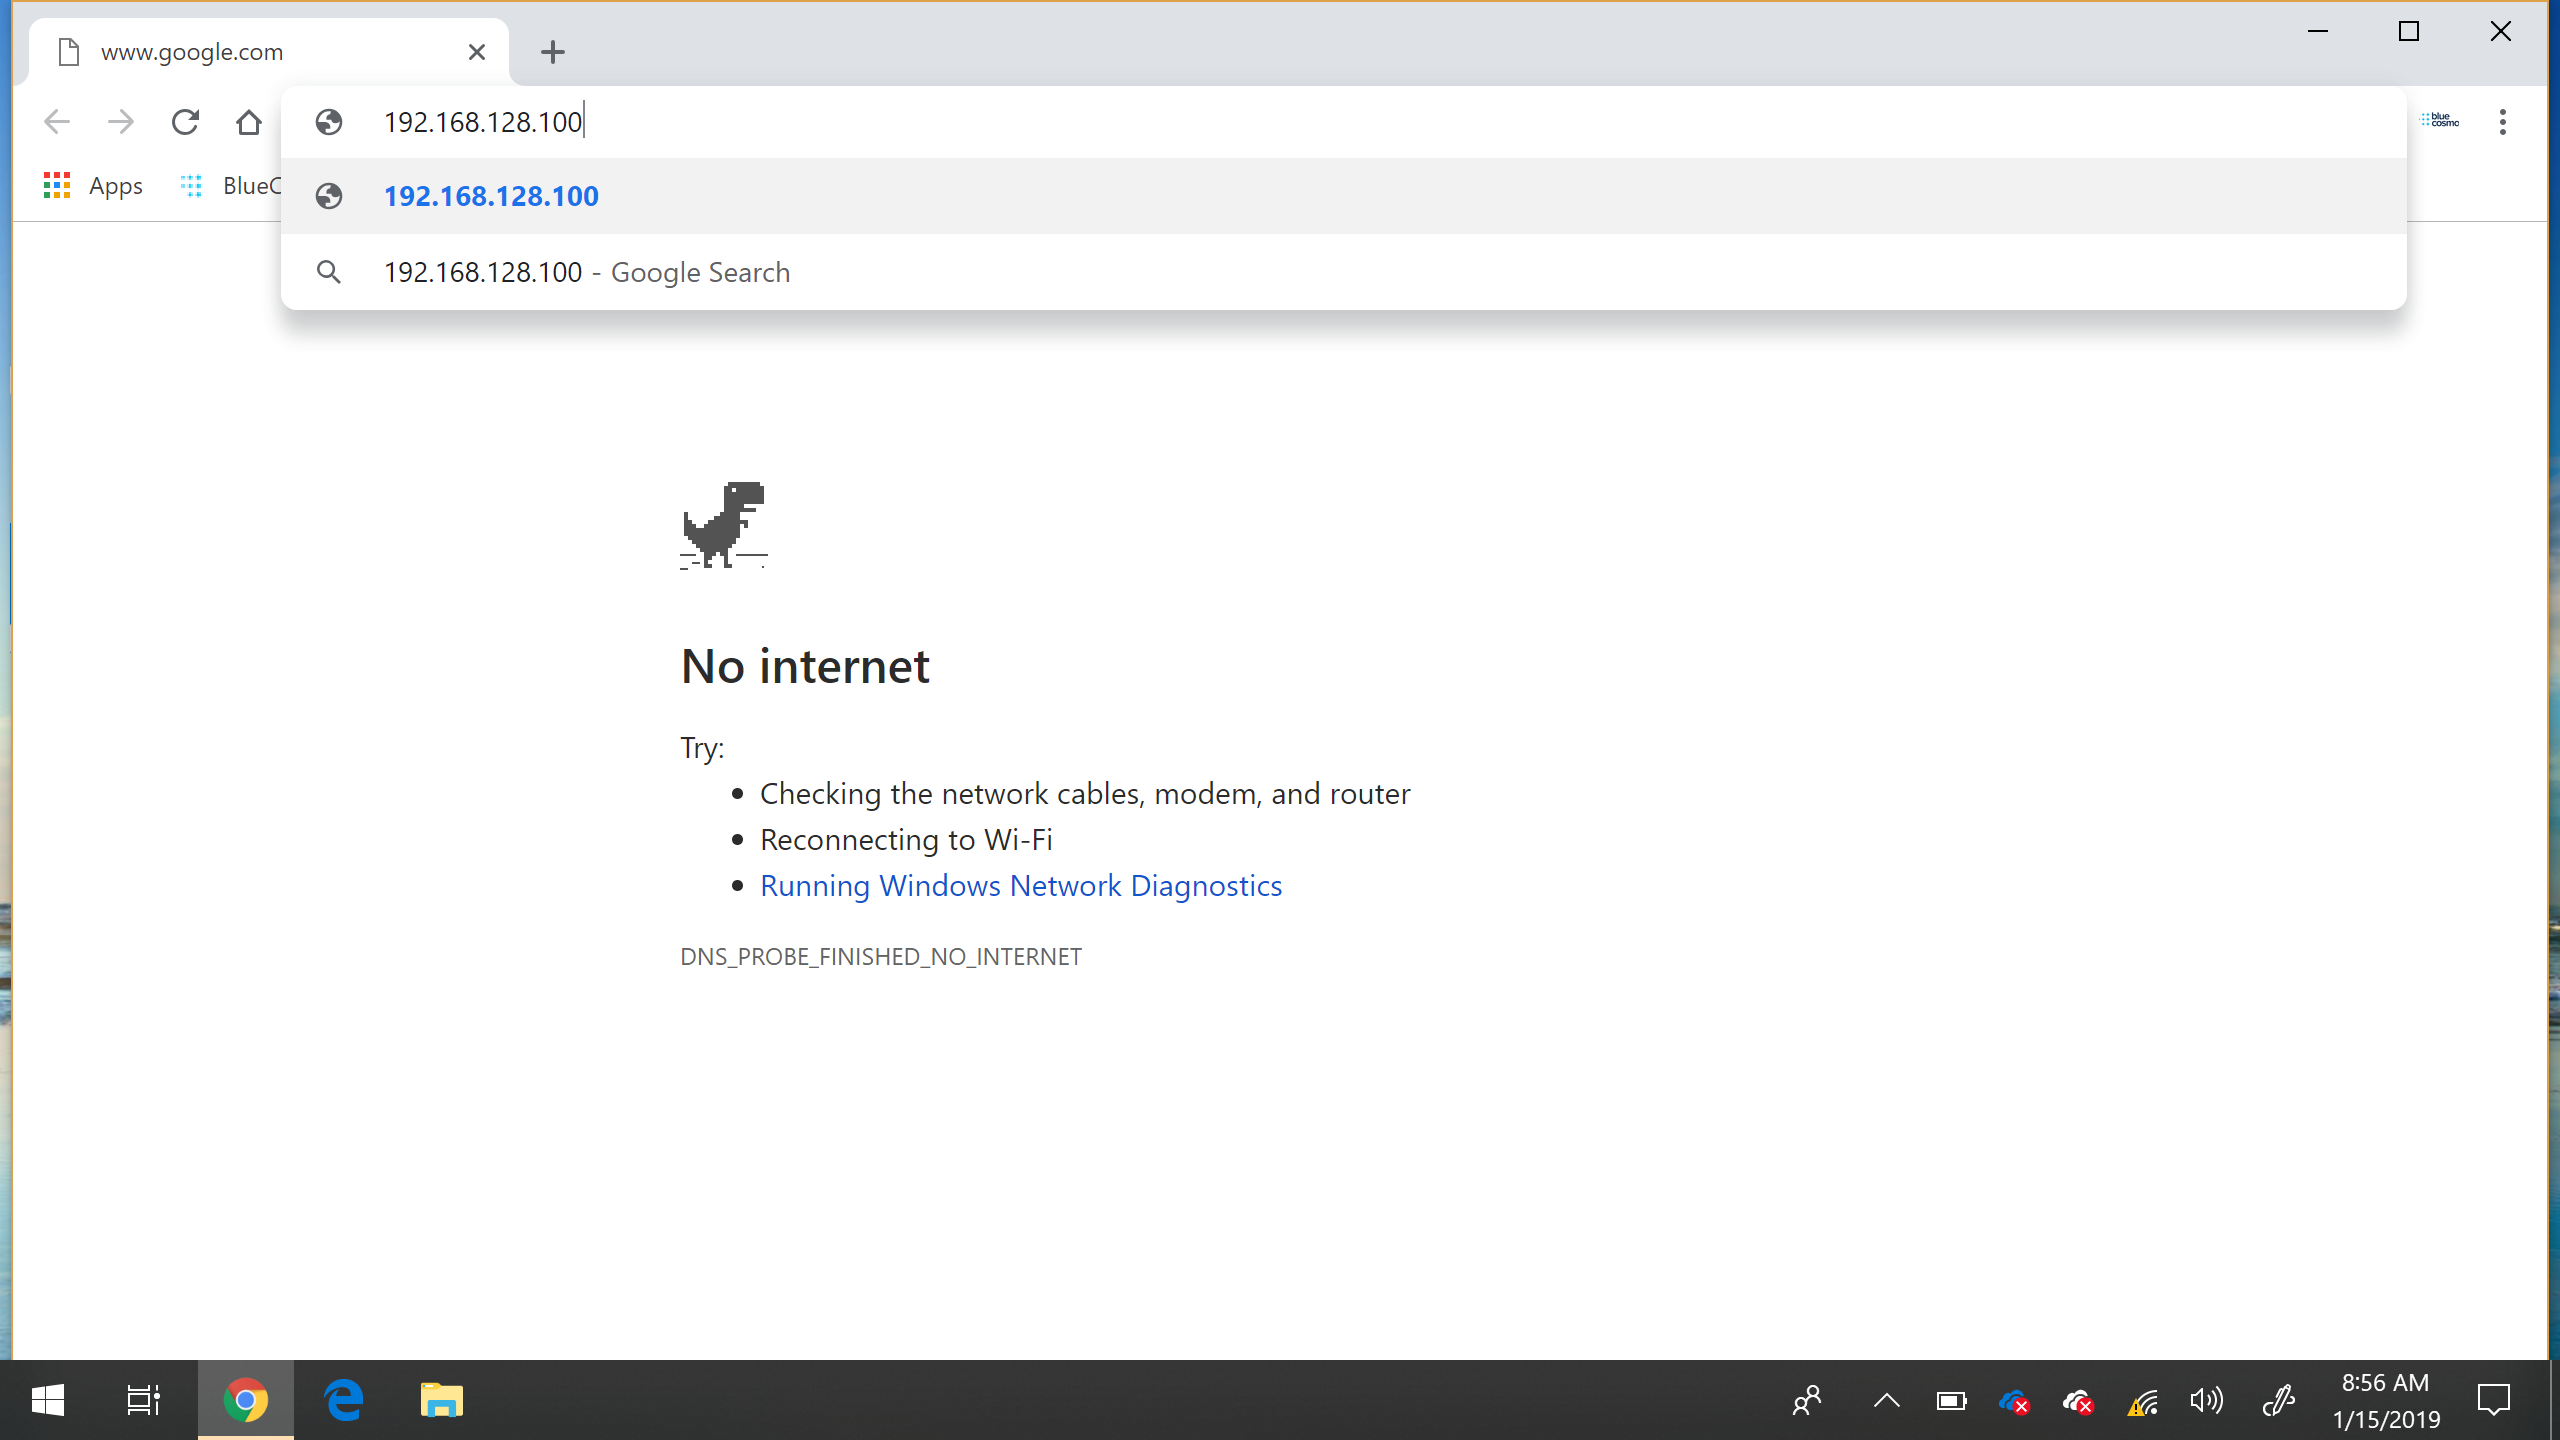
3. Open a browser and navigate to 192.168.128.100 to access the Web Console Home
These are the minimum computer system requirements for successful interface with the Satellite Terminal: Microsoft Internet Explorer (IE8 or above), Edge, Firefox or Safari. Chrome can be used but does not support downloading files from the Support page.
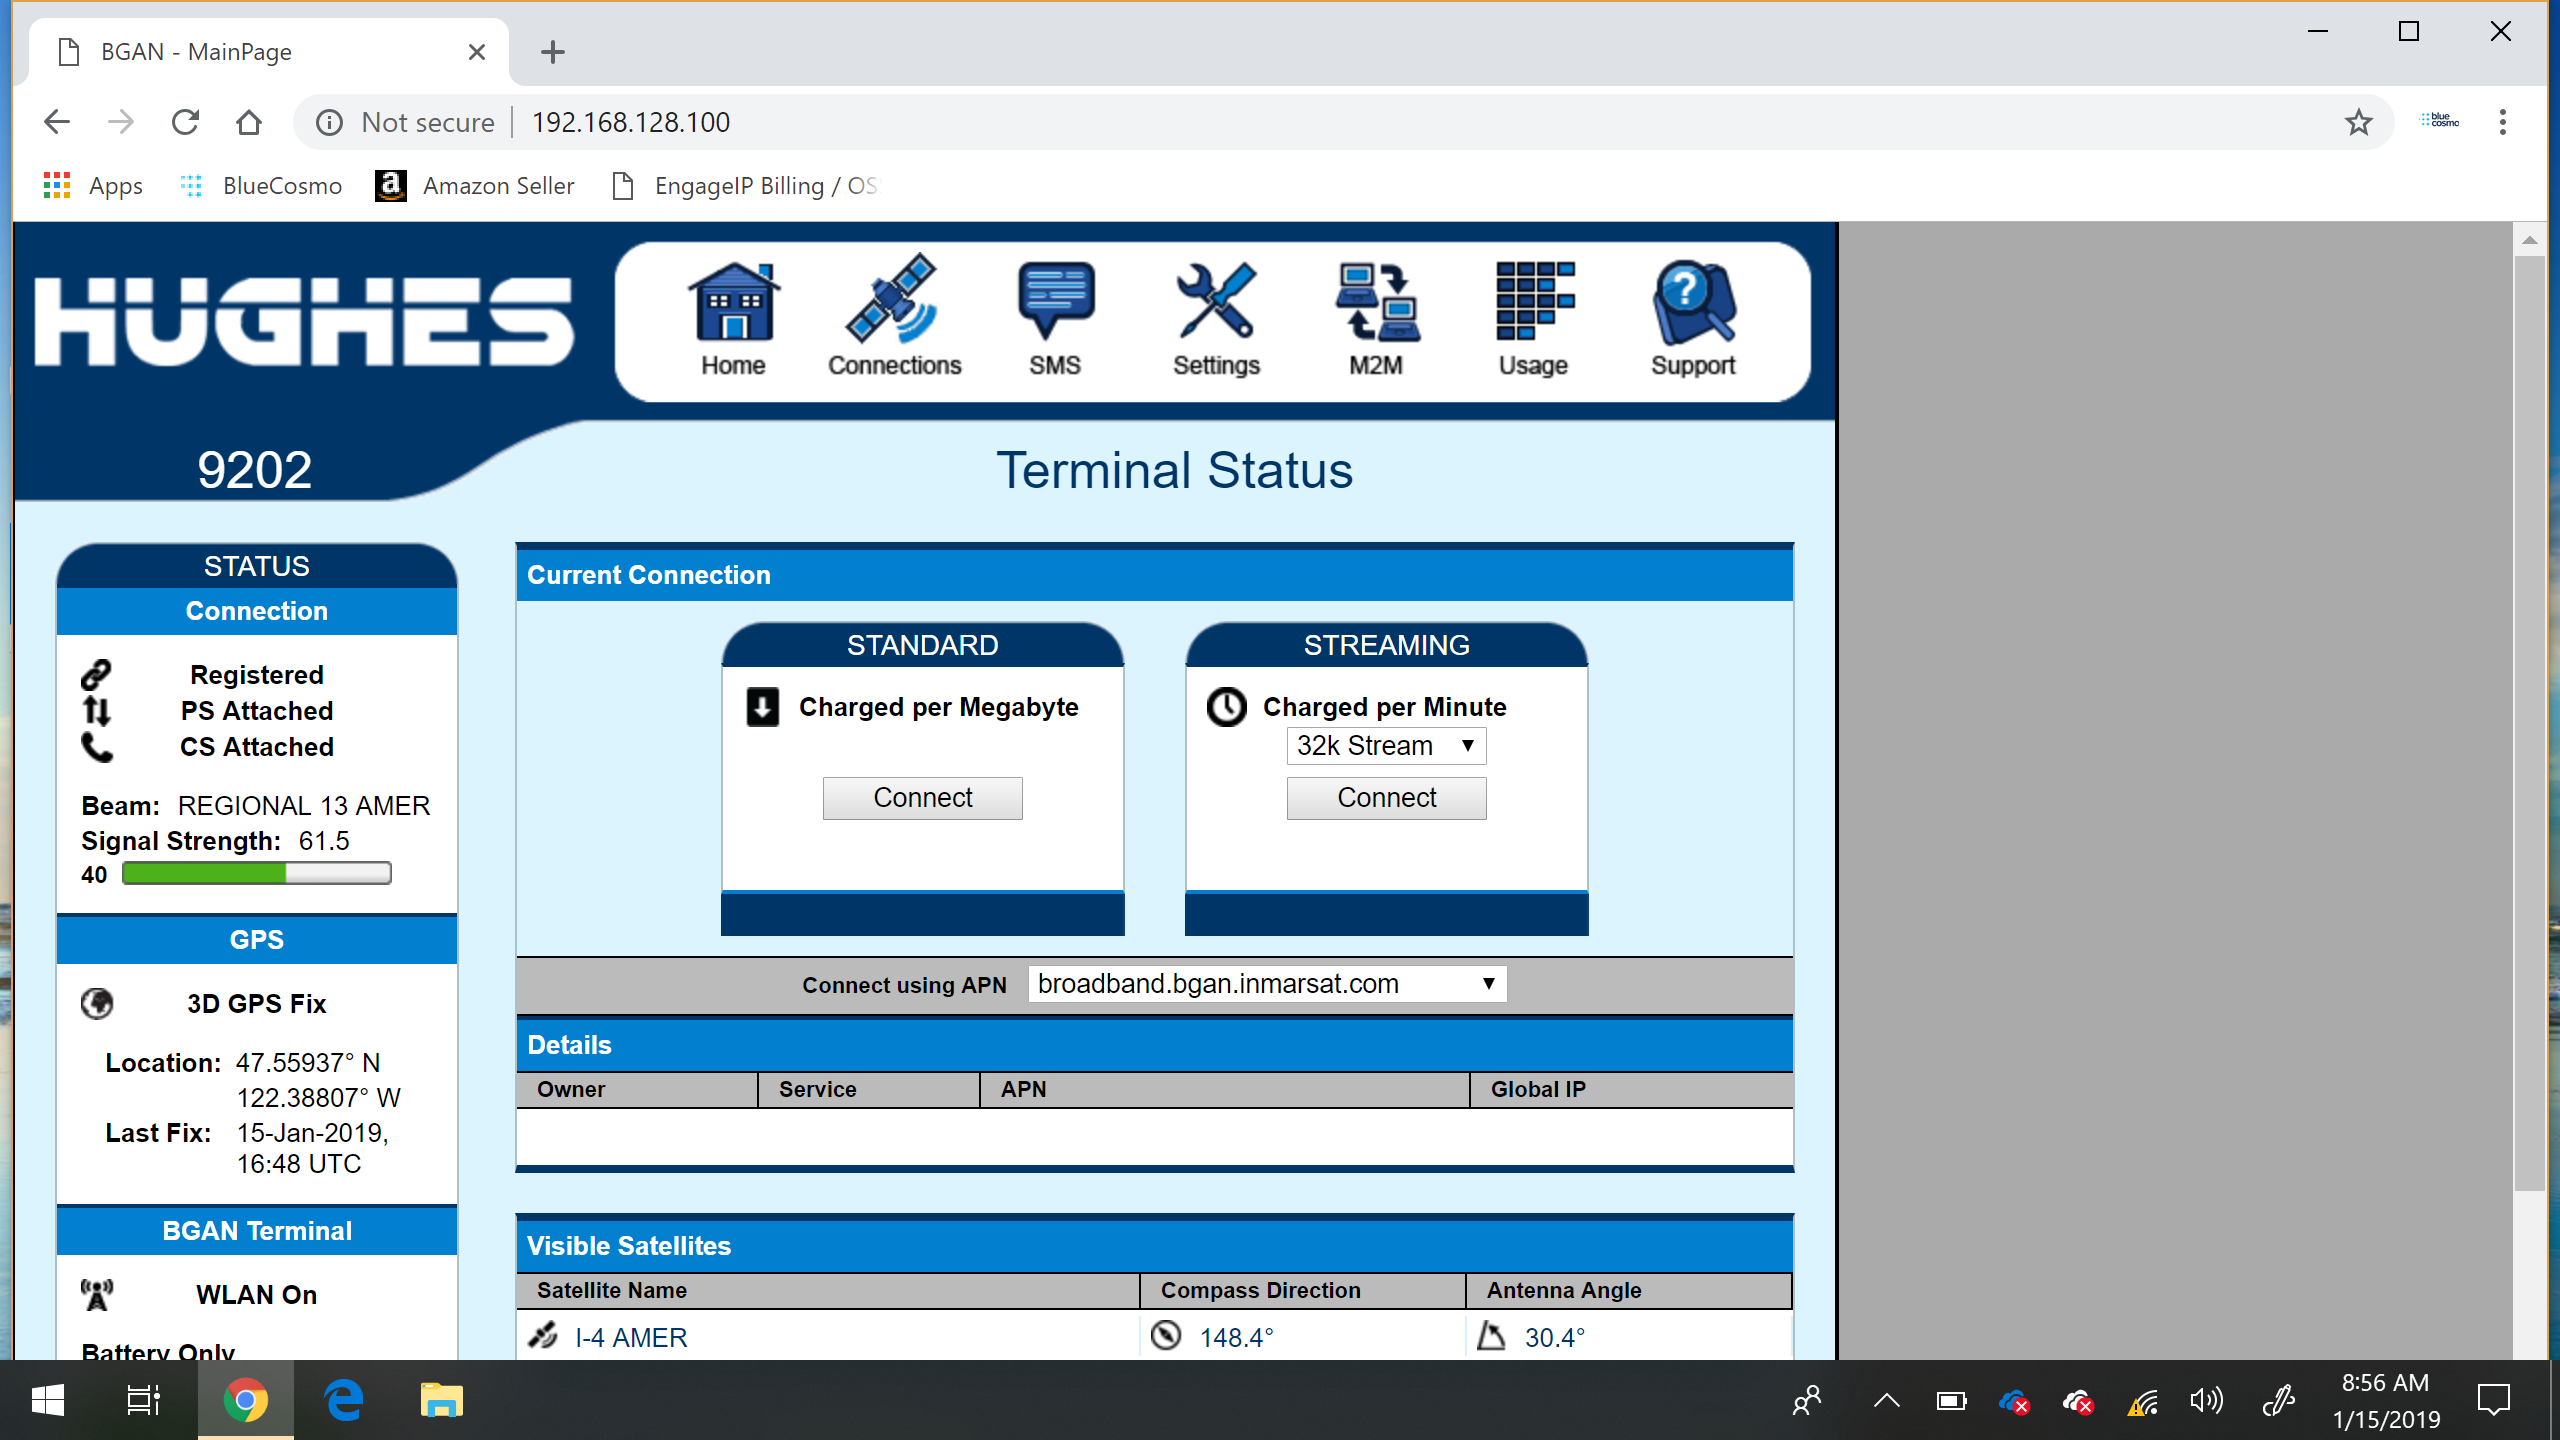
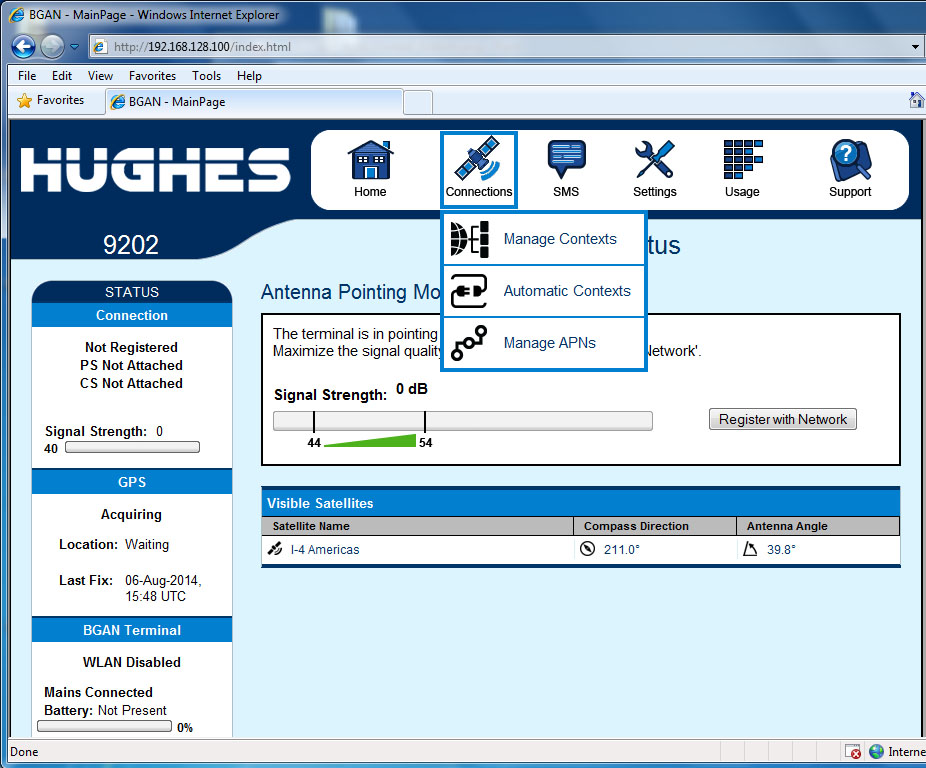
4. Once the Web Console loads, you will see all options available to you.
5.Hover over Connections, and select Manage APN’s from the dropdown
6. At the manage APN Screen, you can remove and APN from the defined APN’s, or add a new APN.
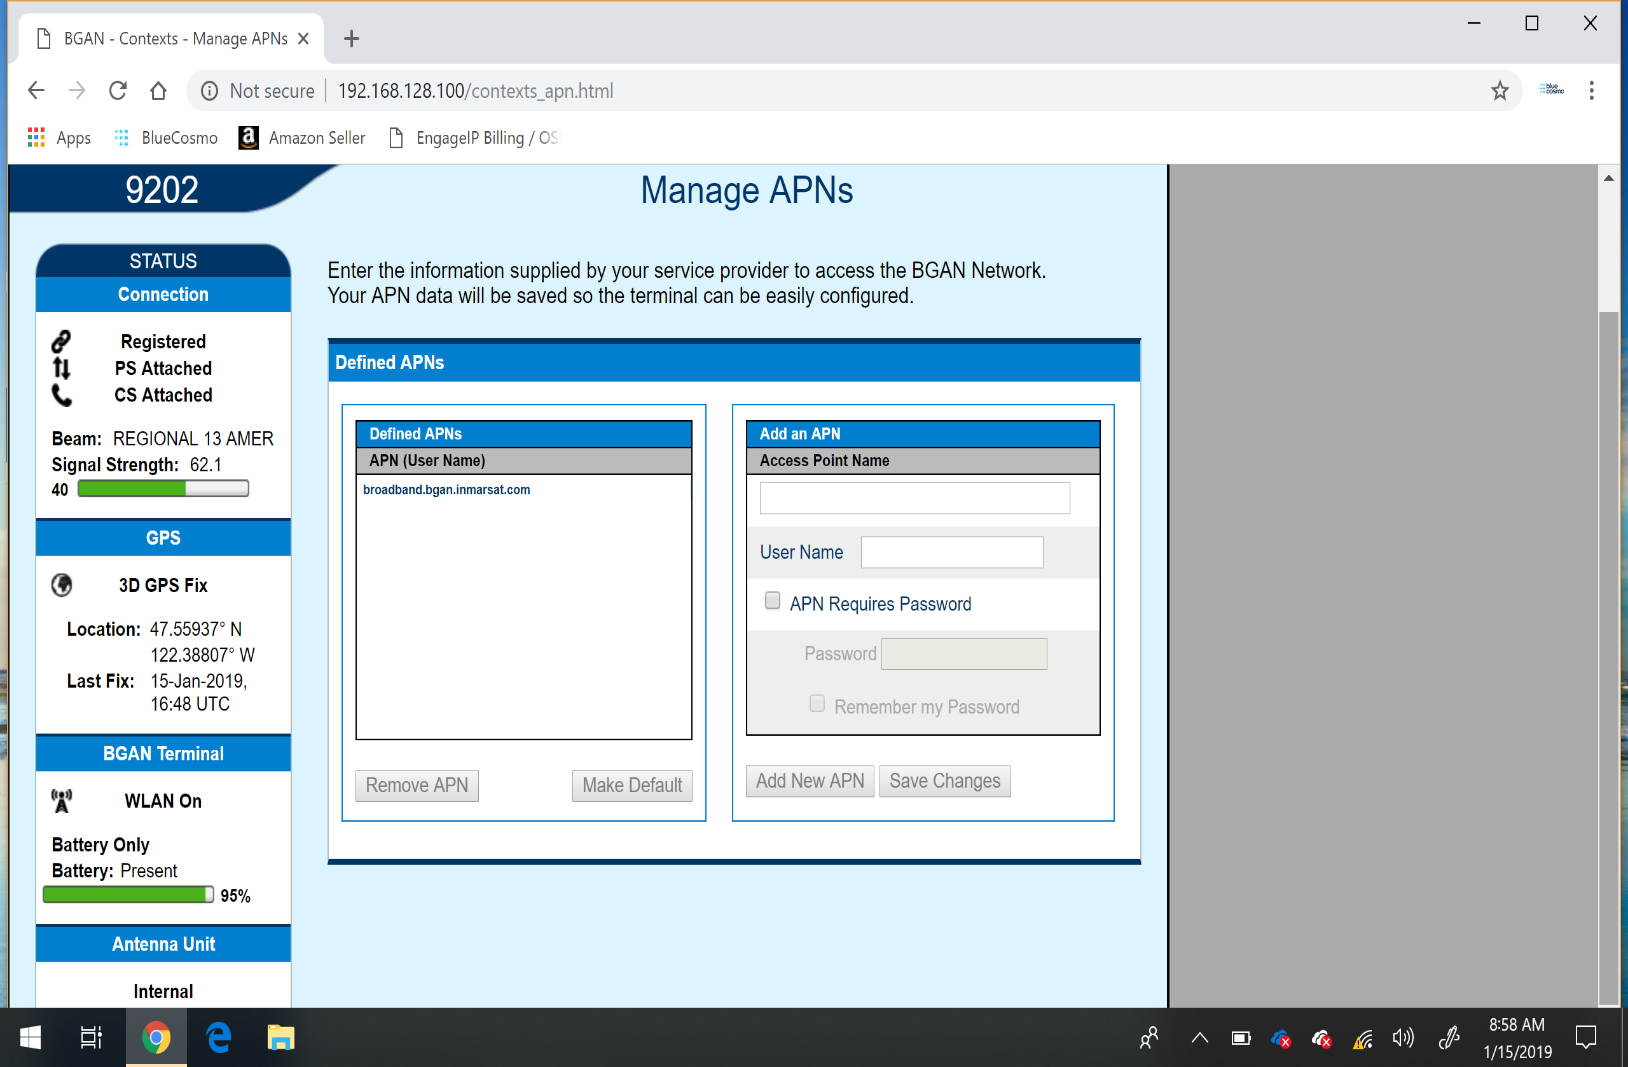
7. Under Add an APN, type in bgan.inmarsat.com into the access point name box. DO NOT ENABLE A USER NAME OR PASSWORD. Once you have entered the new APN in the Access point name box, click Add New APN. This will move the new APN into the Defined APN’s box on the left-hand side.
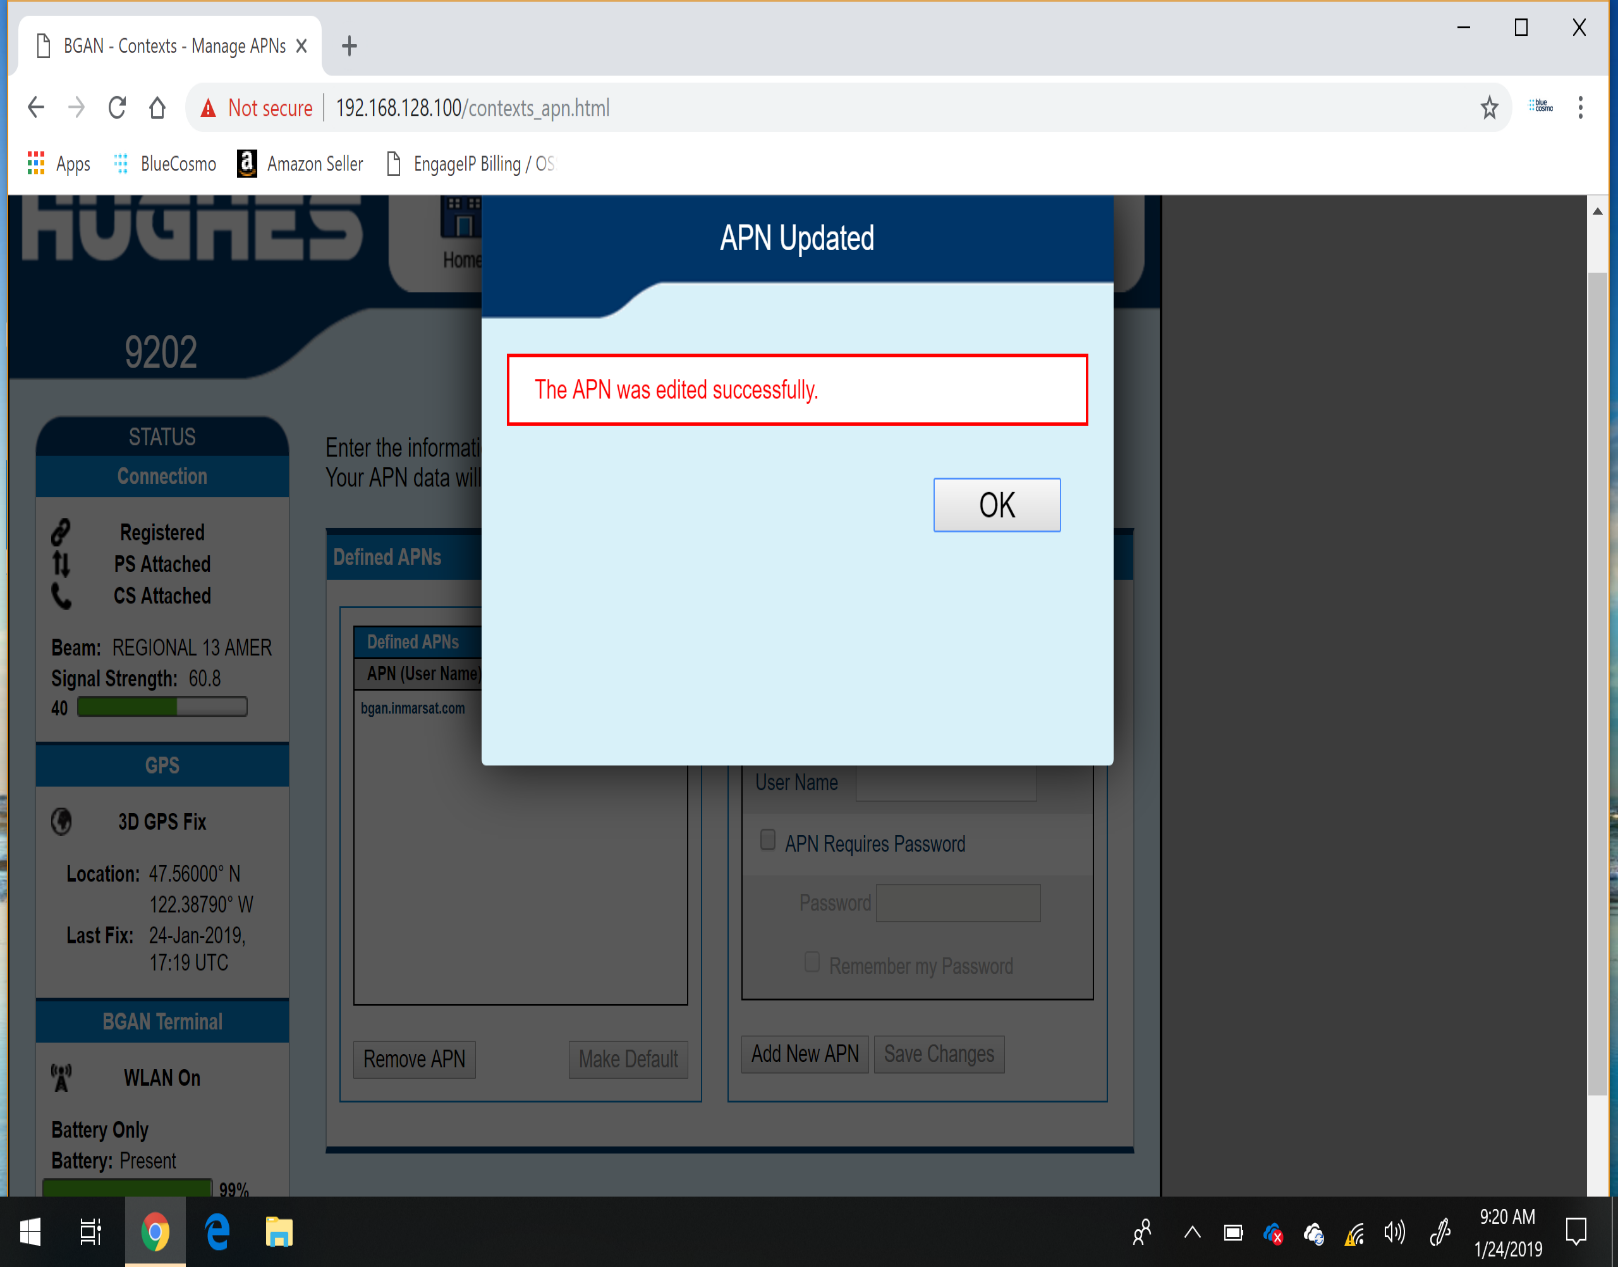
8. Select bgan.inmarsat.com from the Defined APN box and click Make Default to change the APN for future use.
Comments
0 comments
Please sign in to leave a comment.